How to give your photos a retro look with your Android (for beginners)
“Retro” is a catch-all term widely used in various art areas, from graphics and photography to furniture design and fashion. Retro photos can instil a sense of memory, romance or reminiscence in your social media posts and pages.
To give your photos a retro look with only your Android handheld, you should first have a grasp of…
The differences between retro and vintage

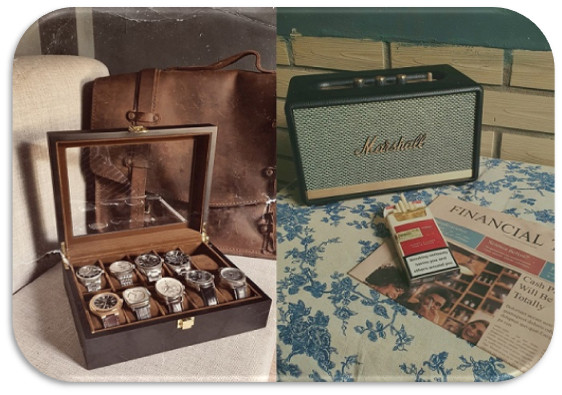
Vintage/Retro illustration photos, with and without grain (PREQUEL filters)
Grain, dust or scratches are signature imperfections of a vintage-style photo due to the environment’s effects on the image over time and how old camera setups operate: they have a fixed ISO level loaded inside before taking any picture. Overexposure, low contrast and saturation loss are also usually seen. A retro-style photo, by contrast, aims to harmonize the age-old elements with modern ones.
Photographers often intentionally tell the viewers that they are imitating trends/ styles of the past, and they leverage the objects’ colours, shapes and contours to create that old-school vibe without sacrificing the image quality. Given that, additional grain or noise works very well in various cases.
In other words, to take a vintage photo, you should have in hand aged objects, choose a classic background, give it a look of age in all aspects possible and accept its colour/layout flaws. In the making of a retro photo, you tend to recreate an old style and infiltrate contemporary vibes in it, but make sure you can drag the viewers back to a certain period of time and even inspire the feelings of “Déjà vu” with your use of colours. You CAN have a high-quality retro photo.
Below are instructions for making retro photos on Android with automatic and manual setups.
Automatic approach: Filters and third-party apps are your best friends.
A host of Android apps provide you with many retro filters. Chief among them are Huji Cam, PREQUEL, 8Bit Photo Lab and Nebi. Feel free to use any other app that suits you the most.
Manual approach: Pay attention to your photos’ saturation, contrast, warmth and details.
STEP 1: CHOOSE A PAST TREND, A CONCEPT, FITTING BACKGROUNDS AND OBJECTS
Look at photos taken in the 1970s, 1980s or your desired period of time to come up with ideas. Pay attention to the lighting setup, colours and which parts of the objects are exposed. The rule of thirds and the golden ratio will help set things up. Use third-party apps or HDR if you want to, and keep the photos that match your ideas the most.
STEP 2: MAKE COLOR AND OTHER ADJUSTMENTS AS FOLLOWS
Have in mind what look you want for your photos: film camera, bright, vivid or grainy. Use a filter if
you want: Retro, PLRD (polaroid) or Film offer enhancements.
Adjust the photos’ contrast, saturation, vignetting, warmth and brightness. To suggest, low levels of contrast and saturation would bring a sense of nostalgia, and an increased brightness may yield your photos a faded highlight look. Using the vignette effect to darken the borders is also encouraged, and your retro photos are less vibrant than normal.

Retro filters really help (PREQUEL)
Choose among different tints to add a feel of time to your photos (for example, a combination of red and yellow palettes can create a 1970s vibe). A warmer colour set often maximizes the turning-back-time effect. Also consider lighting, shadow and exposure settings before applying fade or grain onto them.
All of the adjustment tools needed can be found on stock Android cameras or third-party apps.
These are only baby steps for beginners to start instilling a classic feel to your photos. Don’t hesitate to try different angles, setups, settings and adjustments.


Comments
Post a Comment